
Aug
Step 1 – Make Sure you Mutual Fund KYC is complete!
To check your MF KYC – Click Here
To Initiate Your MF KYC – Click Here
Please Note – You will need to have the following documents ready while doing an Online MF KYC
- Image of Aadhar Card (With Number Linked / OTP Download Enabled)
- Image of PAN Card or PAN Intimation Letter (Linked to the Aadhar Card)
- Image of Bank Record Proof ( Cancelled Cheque / Statement / Passbook)
- Image of Signature on a plain paper (As per PAN Card)
- Operational Email ID ( Where OTPs Can be received)
- Operational Phone Number ( Where OTPs Can be received)
In Case you are not able to do the MF KYC Online, Download the form from the Link below and Submit it to our respective team members.
Click here to Download the Offline MF KYC form
Step 2 – Sign Up on the Website / App
If you have an Android Phone You can sign up with the Same Details on our App.
Please Note: Below mentioned Details should match with the details provided at the MF KYC Portal.
Click here for Android Portfolio App
Click here for Online Portfolio Login
Post the Above mentioned Process Fulfillment, Our team will receive an authorization request.
Once authorized you can move to the next step to continue you investment journey.
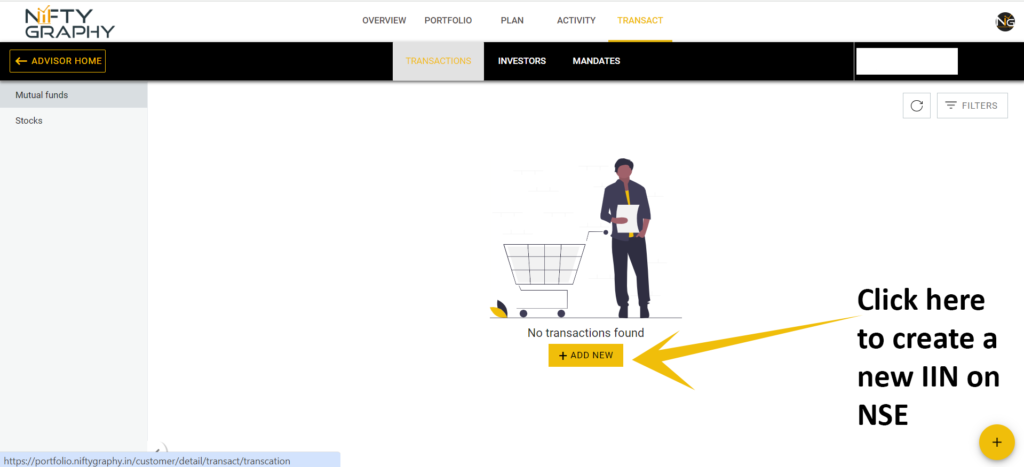
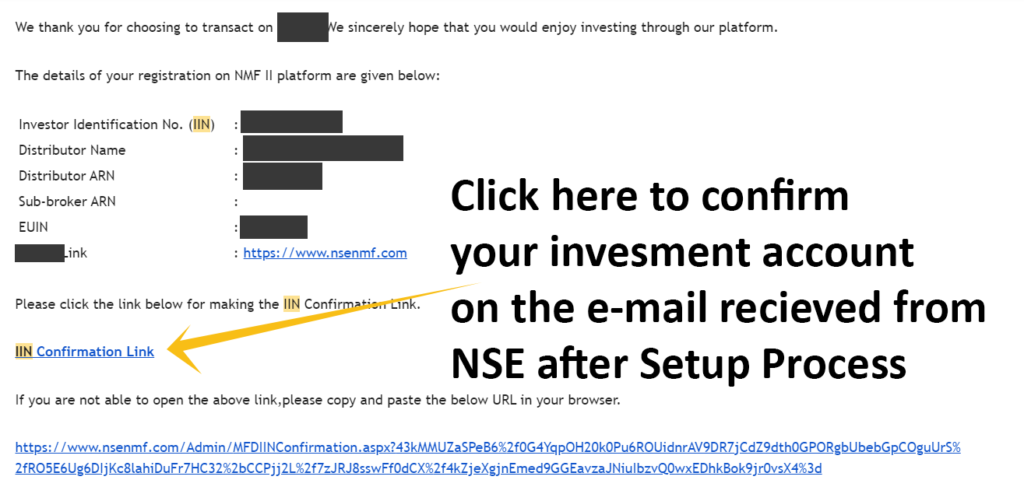
Step 3 – Set Up IIN Investment Account with National Stock Exchange with us!

Once you have signed yourself up and authorized on the email as well, You will need to Set Up and Investment Account on National Stock Exchange
Step 3.1 – For Website –
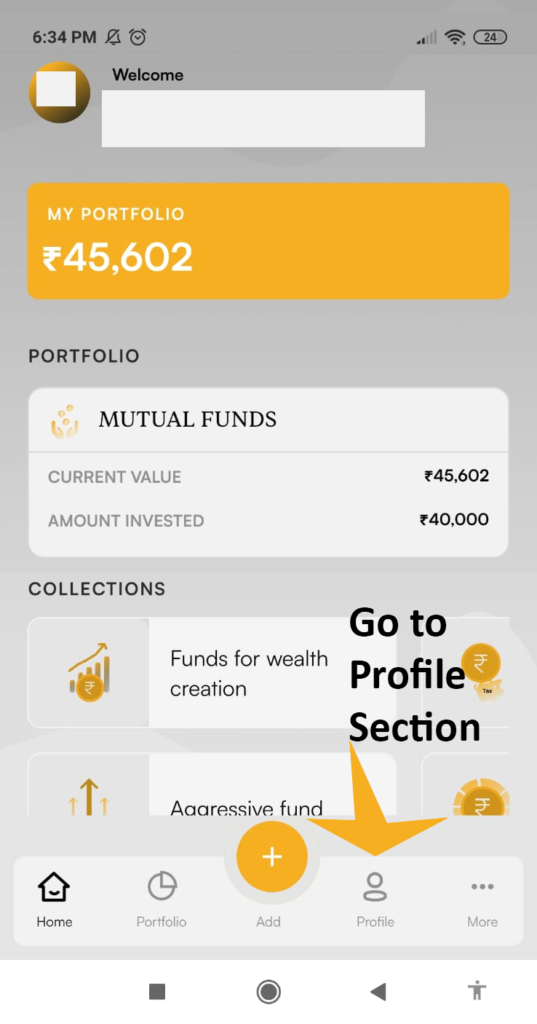
Step 3.2. For App
Step 3.2.1 – Go to Profile Section on the App
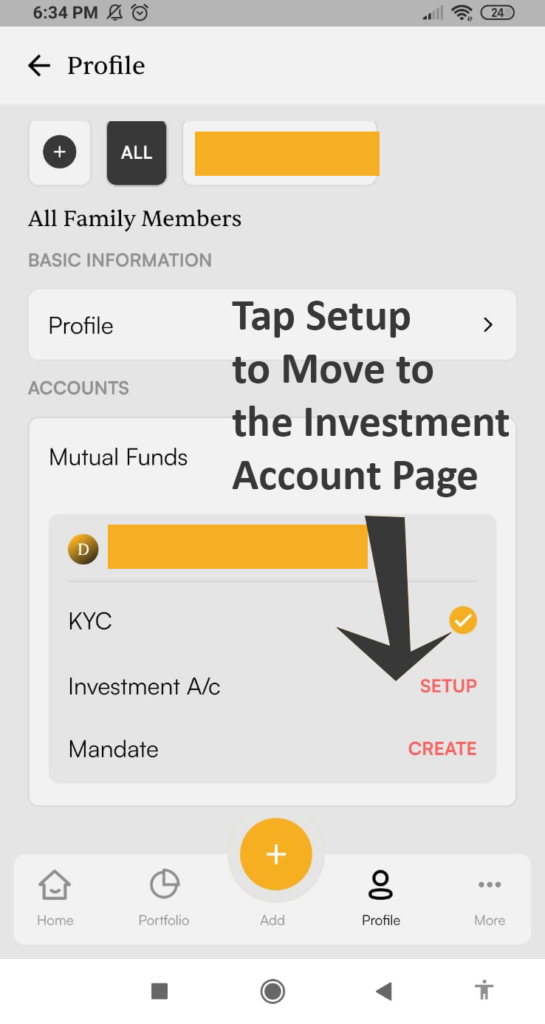
Step 3.2.2 – Tap Setup to Move to the Investment Account Page
Step 3.2.3 – Tap on “Investment Account”
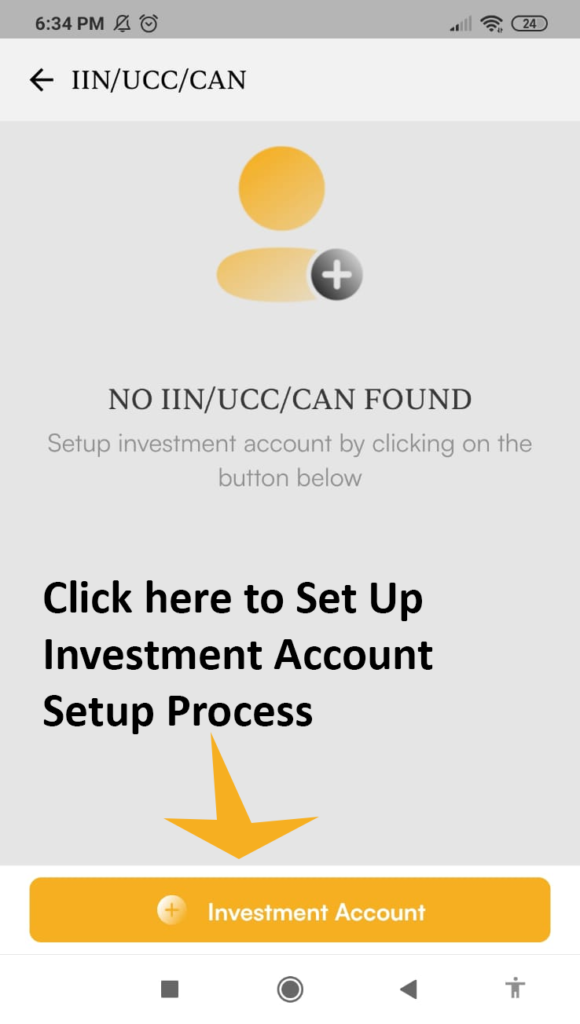
Once You begin with Process, you will be required to put in the following
- Aadhar number (With Number Linked / OTP Download Enabled)
- PAN number
- Account Number , IFSC Code , MICR Code, Account Name – Same as PAN
- Operational Email ID ( Where Confirmation Can be received)
- Operational Phone Number ( Where Confirmation Can be received)
Post the Above mentioned Process Fulfillment, you will receive an authorization request on the provided email where you shall be required to confirm you account Setup (Screenshot Attached below)
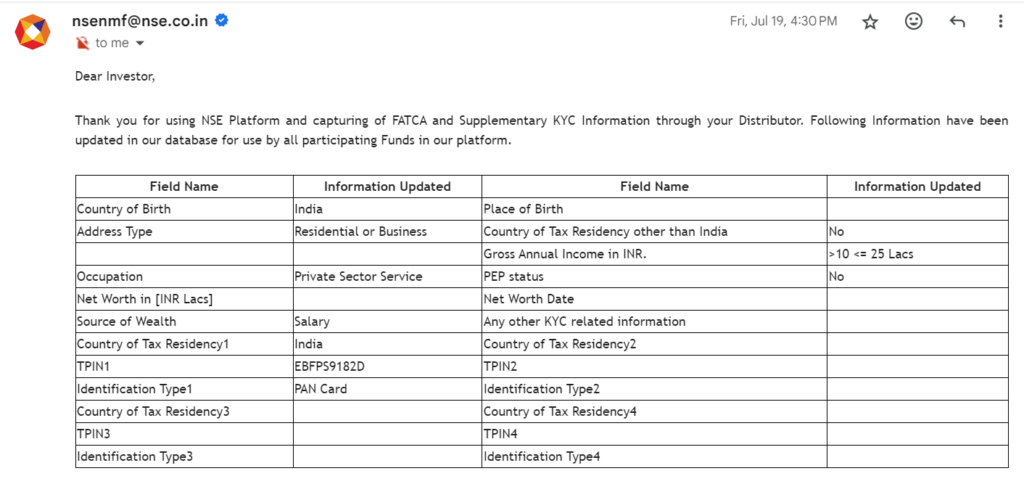
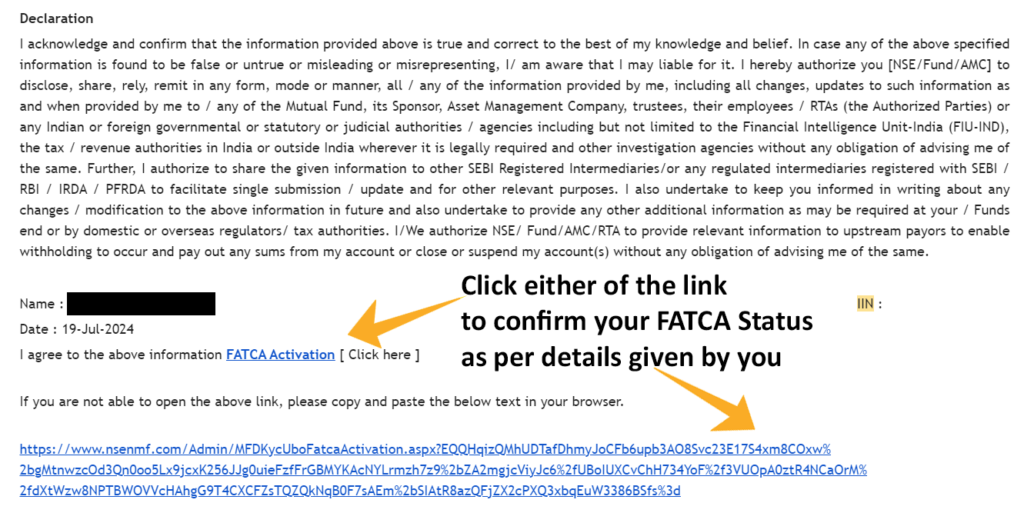
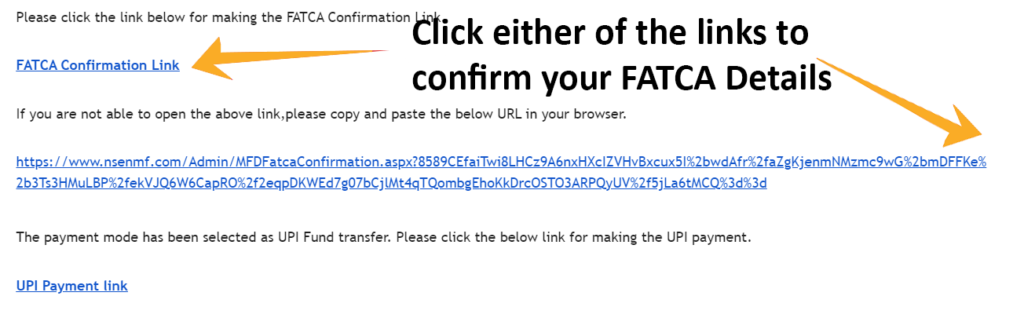
Step 4 – Complete the FATCA Declaration on E-Mail
Once your account is Investment is Set up and Authorized from your end on Email, you will receive another link on the registered email to Confirm FATCA Status (Click here to understand what FATCA is and why is is required)
You will need to confirm the FATCA Status before you can Start Transacting in mutual Funds.
Please note – Even if you have cleared FATCA from any other platforms, You will have to confirm it again with us as per the rules of SEBI and AMFI.
Please Refer to screenshot below to see what the email is going to look like for FATCA Confirmation.
or you can also do it with a Transaction Request from our backend wherein the Email will look like the screenshot mentioned below.
Step 5 – Initiate a transaction!
It is highly recommended that you do not choose a fund on your own as “Mutual Funds are Subject to Market Risks and can lead to Losses as well” if not done under a Financial supervision.
Also, you can refer to our regularly updated research for better selection of funds with respect to your financial planning – Click here to see the research.
There are 2 Ways to Initiate a transaction.
- Do it yourself from the APP / Website Portfolio Log in.
- RM Assisted Transaction which you can authorize via an OTP & Payment Link
Please note –
- UPI Transactions will not be carried beyond a limit of Rs 1,00,000 per day
- Make sure you choose the right payment method – Net Banking / UPI or E-Mandate before proceeding for payment.
- Some funds do not accept payments in Lumpsum or SIP or both.
- Mutual Fund transactions can take upto T+3 working days to execute and you can always check the status of the transaction in the App or Website.
Reach out on the customer support number for any assistance or while facing any problems.